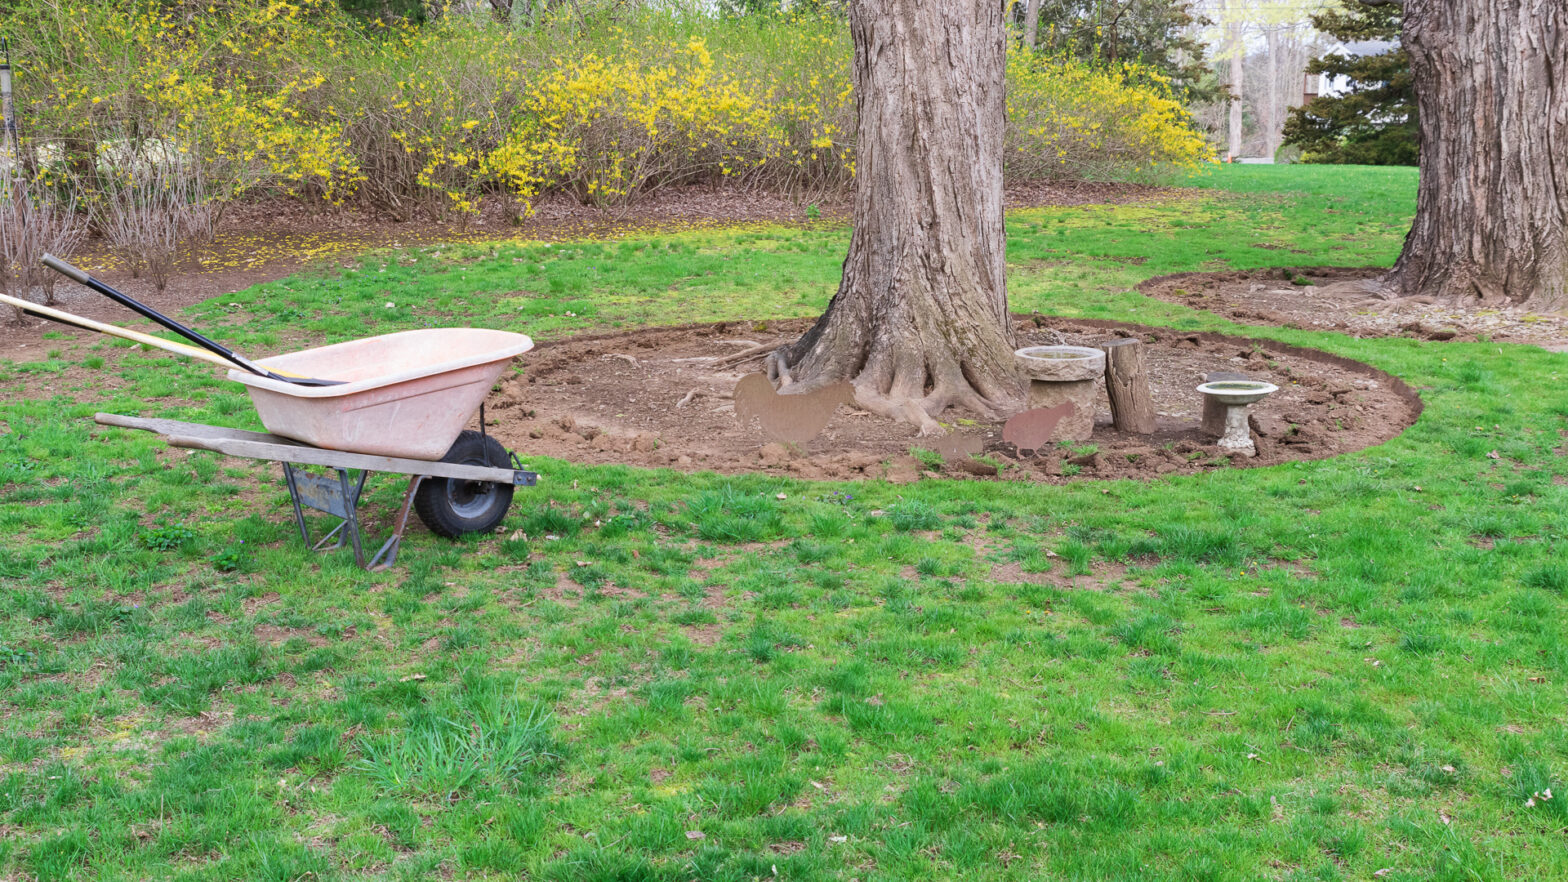
The other day I removed pokeweed (Phytolacca americana) and mugwort (Artemesia vulgaris) from the garden.
I left them in the wheelbarrow to dry out.
Once dry, and dead, I’ll add them to the compost pile.
There are many options to dry out invasive or hard to kill weeds. They can be placed on the driveway. They can also be bundled and hung from a tree. Another idea is on top of a stone wall or boulder.
Both weeds will regrow if put directly on the compost pile.
Better stated, mugwort and pokeweed are guaranteed to grow if placed directly on the compost pile, especially mugwort.
Mugwort and Pokeweed Roots
Mugwort has fine roots that break easily.
If you see mugwort remove it quickly and do your best to get all the roots.
Pokeweed has a deep tap root.
Use a spade to dig out the deep tap root or the plant will return.
Click for more information about mugwort (Artemesia vulgaris)and pokeweed (Phytolacca americana).
Yesterday, I cut a fresh edge around a couple of sugar maples with my favorite grass edging tool. We had rain and fog in the morning and the soil was soft. Perfect for edging!
Spade for Grass Edging Tool
Sometimes, I prefer to use a sharp spade to edge the lawn. I don’t always use an edging tool.
Sharp, clean and oiled tools make me a better landscaper.
It’s easier to edge a curved bed with a spade than a grass edging tool. The curve of the spade works with the curve of the bed. Don’t get me wrong, I can cut straight or curved edges with either edger.
When cutting edges with a spade, keep your cuts close together to avoid a sawtooth edge. You can see each individual c-shaped cut of the spade below which is acceptible.
I like edging with a spade better but it’s rough on my shoulder and takes more planning. The tighter the curve the more I prefer the spade for an edging tool.
Cleaning up Edgings
It didn’t take long to re-edge these two tree rings with my grass edging tool. I decided to wait to clean up the edgings. In a day, or two, the edgings will dry out becoming lighter and easier to clean up.
I use a flat shovel or pitchfork to pick up the large pieces of grass and rocks—a light raking levels out the remaining soil.
Edgings are great for filling low spots in the yard. Further, if you’re lucky, there’s a low spot closer than where you would dump the debris.
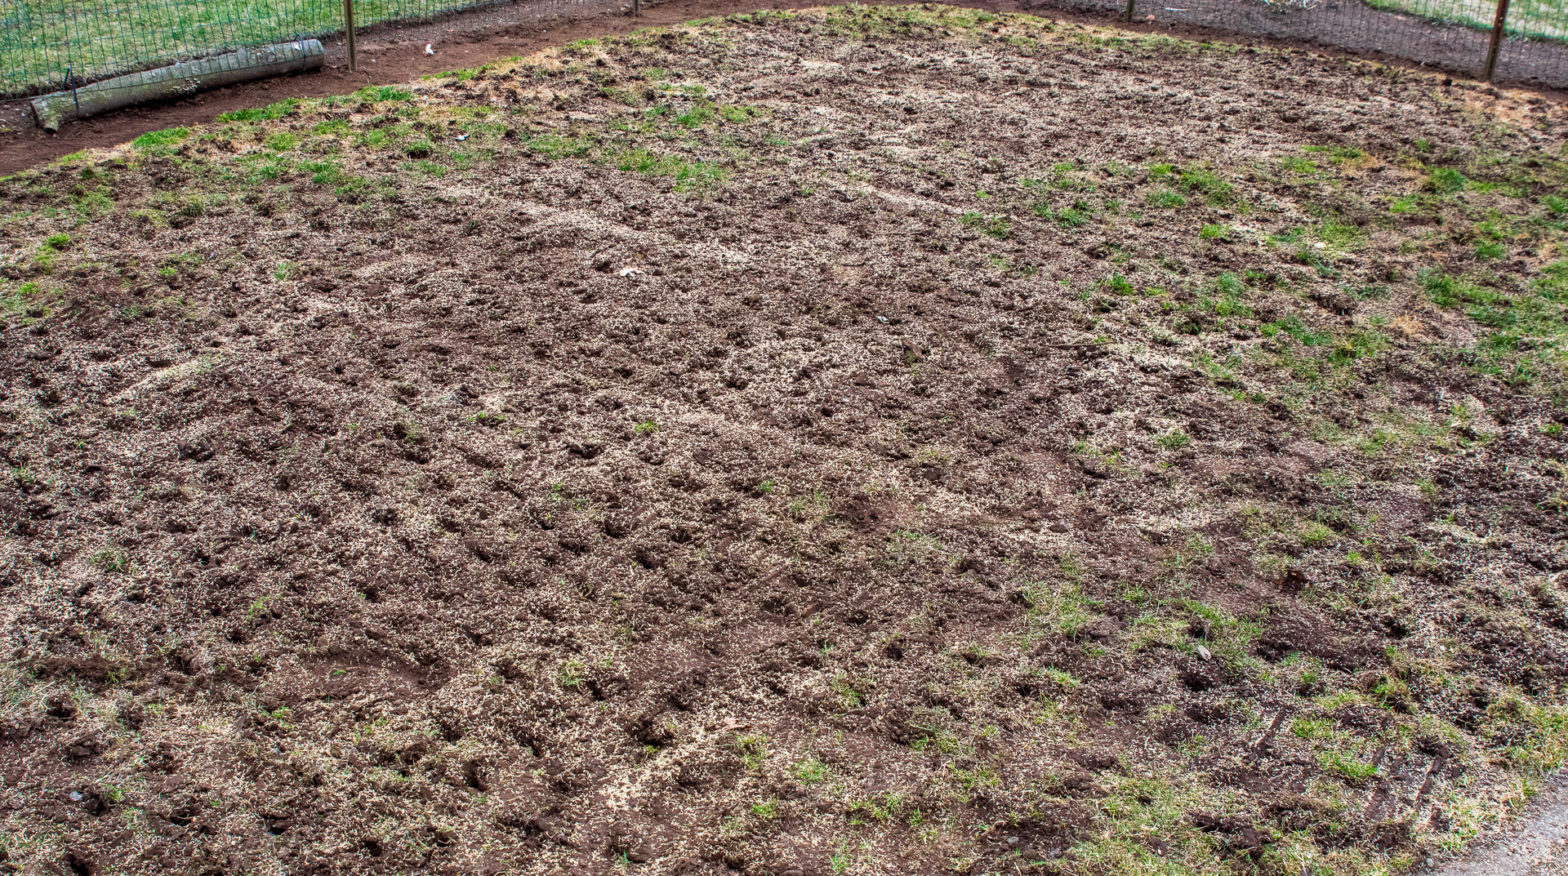
A couple of weeks ago I performed a spring seeding of my lawn and would like to share some spring seeding tips. My goal was to fill bare spots and overseed my dog’s run. Overseeding the run is most likely a waste of time but I had to give it a try.
I live in USDA Hardiness Zone 6 where we grow cool-season grass. In a nutshell, cool-season grass goes dormant in the winter when temperatures are cold and over the summer when temperatures are hot.
My goal is to complete spring overseeding as early as possible. Definitely before forsythia bloom. If there are a few warm days at the end of winter and the ground isn’t muddy I take advantage of the opportunity to overseed thin spots.
The ideal time to plant cool-season grass is late August to September when temperatures are cool and rainfall abundant. I don’t plant new lawns in the spring unless absolutely necessary. However, spring overseeding and filling bare spots is acceptable.
The first thing I did was run my Aerovator over the bare areas. If you don’t have an Aerovator you can rent an aerator or use a metal rake to roughen the soil. Grass seed wants to grow and if kept moist it will.
The Aerovator has solid tines, unlike an aerator’s hollow tines, which penetrate the soil and vibrate.
Again, you don’t need an Aerovator to do the job but once you see the results you’ll be amazed. The machine leaves the lawn spongy soft with holes that allow air, water, nutrients and seed to enter.
While the Aerovator is an aggressive machine, you can control the amount it disturbs the soil. However, if there is no grass cover, like my dog’s run, the results are very similar to using a tiller.
Once I aerovated the lawn I generously spread Lesco Shady Select Grass Seed. I have a lot of sugar maples that provide plenty of shade.
Most cool-season grass seed mixes contain bluegrass, fescue and ryegrass. If you have shade you want a seed mix with more fescue. The amount of fescue in this seed mix is off the charts! I can’t wait to see how it does.
When seeding I always go heavy. Clients like to see grass as soon as possible and I like to grow grass as thick as possible.
I used the back of a bamboo rake to incorporate the seed into the soil. While I know every tutorial ever written on planting grass says to do this I admit I often skip this step and the seed does wonderfully. Again, the secret to growing grass is to keep the seed moist.
Finally, I top-dressed the area with a light coating of compost. I would say the compost is 1/8 to 1/4 inch thick.
I selected well-aged compost with little debris. I picked some debris out while shoveling the compost into the wheelbarrow.
Once finished composting I walked away and didn’t water once. It’s been a relatively warm, yet dry, spring and I’m happy to say after two and a half weeks there’s a green fuzz in the backyard. We did get a couple of rainstorms.
I would have better results if I watered the new seed, and you will too, but it’s early enough that mother nature will do most of the work. Seeing the seedlings motivated me to start watering though it’s supposed to rain the next couple of days.
As you can see above seeding my dog’s run was an exercise in futility. However, if you use these spring seeding tips in your yard you’ll have great results.
Some landscaping practices should be avoided. Below are my top three landscaping pet peeves.
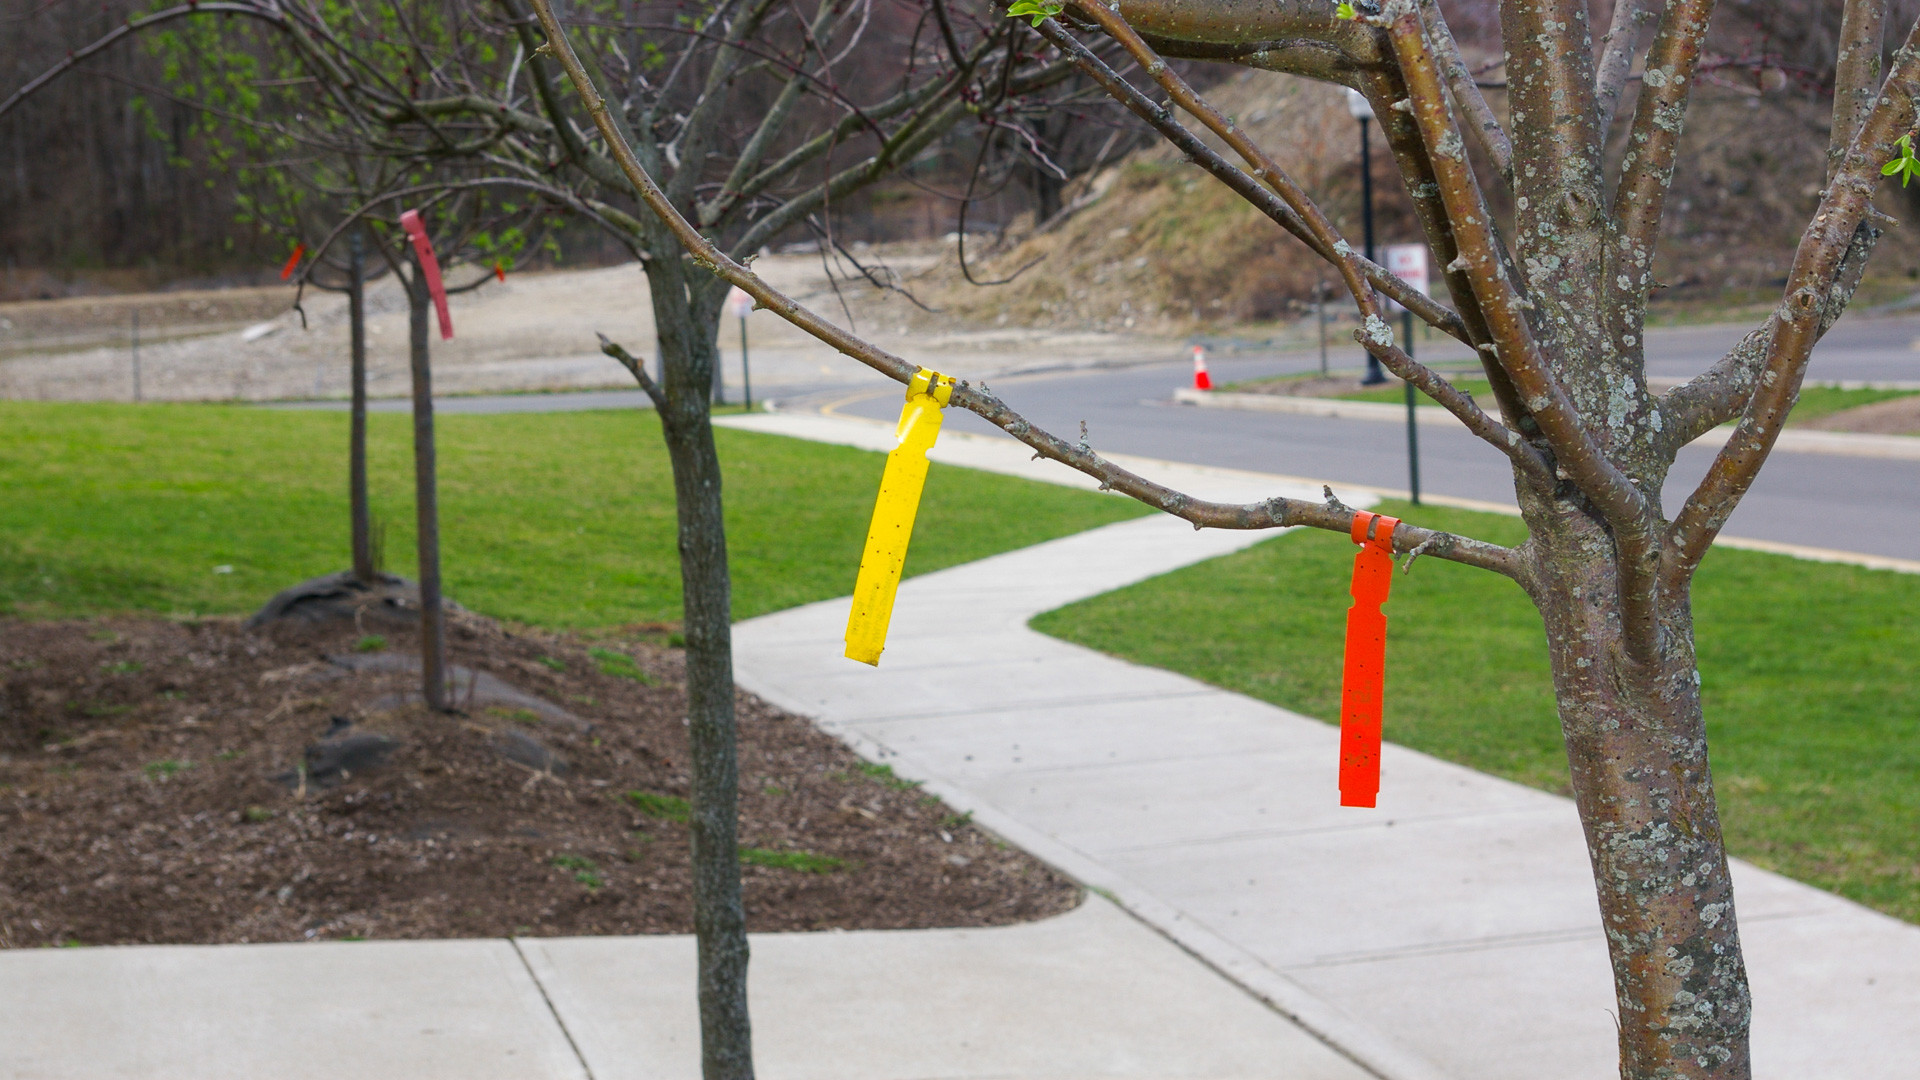
Tags left on Plants
Why would anyone leave plant tags fluttering in the wind? Leaving tags on plants takes a beautiful landscape and makes it look like the side of the highway. Please remove all tags before leaving the job.
I occasionally leave a tag on a new plant, at my house, so I can remember what I planted or learn a plant’s name. However, if you’re bringing a plant to someone’s house either know what it is or keep a list of what you planted.
A great way to practice plant identification is to walk through a newly installed commercial landscape. Guess what the tree or shrub is and check the tag to see if you got it right!
Landscape Fabric
There’s never a reason to install landscape fabric under mulch.
In a few years, the mulch will break down and weeds will grow into the fabric becoming a headache to remove. In ten to fifteen years, when it’s time to redo the landscape, someone will suffer while ripping the fabric out. If you’ve never ripped out landscape fabric I assure you it’s no fun.
There’s never a reason to install landscape fabric under gravel either.
Dirt settles in gravel and creates the perfect seedbed for weeds. Weed roots anchor to landscape fabric under gravel the same as under mulch. It’s more of a hassle than it’s worth.
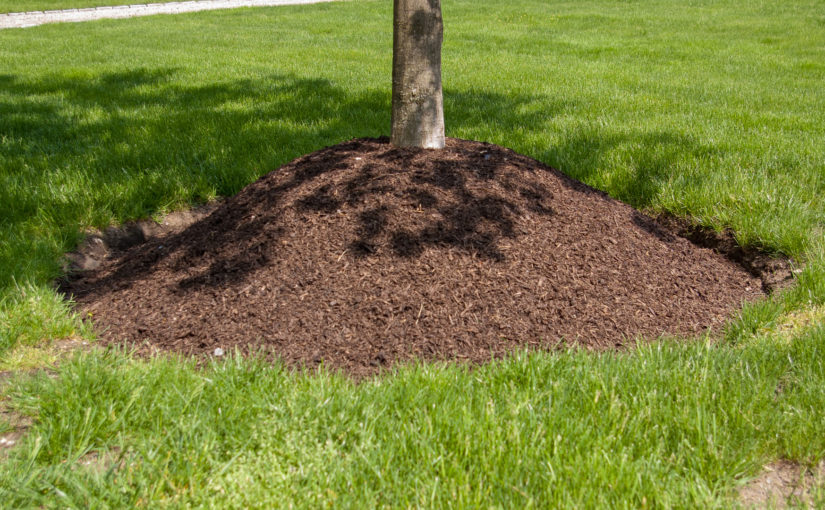
Volcano Mulching
Trees are not supposed to look like a fountain of lava shooting out of the top of a volcano. If you leave mulch against the base of a tree you’re doing more harm than good.
A properly mulched tree should have, at most, two to three inches of mulch tapering down six inches or more away from the tree.
Please stop the volcano mulching madness.
If you’re new to landscaping please heed the pet peeves on this page so your landscape doesn’t suffer.
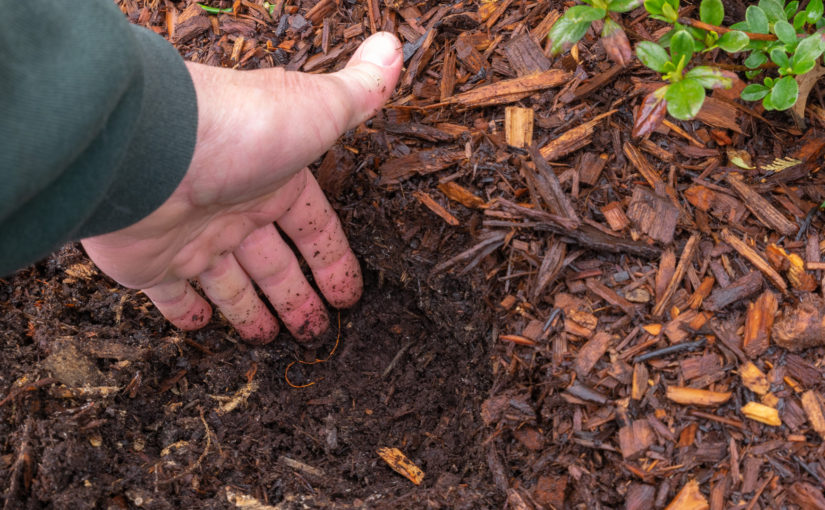
This spring I visited a home that had recently been mulched and was shocked at how deep the mulch was and how little preparation went into the job.
Weeds that had been covered in mulch poked through and the mulch was easily four to five inches deep.
I recommend carrying a soil knife and removing perennial weeds, such as Dandelion, down to the root before mulching.
This garden should not have been mulched; the time and expense should have gone into weeding.
Deep mulch leads to unhealthy plants and looks unnatural. On some jobs, I have to remove deep, old mulch before applying new.
Once a garden is established an inch of mulch is all you need.
Benefits of light mulching include:
Mulch won’t require yearly turning.
Oxygen can easily enter the soil.
Mulched over tree bark won’t become an entry point for insects, disease, and rodents.
Water easily filters through.
Less mulch looks more natural, like a coating of leaves on the forest floor.
Plant roots grow into the soil instead of growing into mulch that quickly dries.
Whether you’re a contractor or a homeowner try not applying mulch one year and see the difference it makes. Your plants will be healthier with significantly less work and expense.
Below is a landscape I mulched this spring by applying just enough mulch to do the job. No more. No less.
Spread less mulch for a more healthy landscape and sometimes you don’t need to add any mulch at all.
Every spring I cringe when I see freshly mulched landscapes. The more is better principle gets beaten silly and mulch spread with reckless abandon.
This isn’t the first time I’ve discussed how to mulch and it won’t be the last. How to mulch correctly is a topic worth repeating.
Volcano mulching is when a mound of mulch is spread around the base of a tree (See photo top of page). The cone grows yearly with each new layer. The sooner we can stop volcano mulching the better.
Below a tree thrives in the forest with no volcano mulching ‘help’ from man. There’s moss growing at the base of the tree because leaves only begin to cover the ground six inches away.
Mimic how mother nature mulches. She doesn’t dump piles of leaves against the base of trees. She spreads a light coating of leaves over the entire forest.
Why is this so hard to understand?
The illustration below shows how to mulch a tree incorrectly by volcano mulching. Mulch spread against the bark creates a moist place that encourages rot. Further, tree roots grow into the mulch making them drought prone. Finally, the mulch is so deep rain runs off and doesn’t reach the roots.
The illustration below shows how to mulch a tree correctly by spreading 2-3 inches or less of mulch 6-12 inches from the trunk of the tree. Mulch doesn’t touch the trunk.
If a tree has over 3 inches of mulch carefully remove it without injuring the bark or roots of the tree.
How to Mulch a Tree Correctly Samples
Below a tree I mulched last year has some dirt and moss around the base of the tree. It would be a shame to slowly kill this beautiful tree by over-mulching.
Another tree mulched the right way. You can see dirt at the base of the tree and that’s good. A few weeds may grow but it’s worth the effort.
How to Mulch a Tree Incorrectly Samples
I often see trees so over mulched you could mulch several more trees with the excess. I’m not kidding!
More volcano mulching. It doesn’t look natural and it’s no good for the tree. The madness has to stop!
Same look, different parking lot.
A beautiful oak tree sentenced to a slow and painful death.
Why would someone do this? I can’t make this stuff up.
Today I used several weeding tools to maintain a garden overgrown with weeds.
Truth be told it was my fault.
Last fall I overseeded the lawn and some seed found its way into the beds. The gardens were a mix of grass, dandelions and chickweed.
I spent the afternoon ‘hacking’ away at the weeds with my weeding tools. I’d like to share the method to my madness with you.
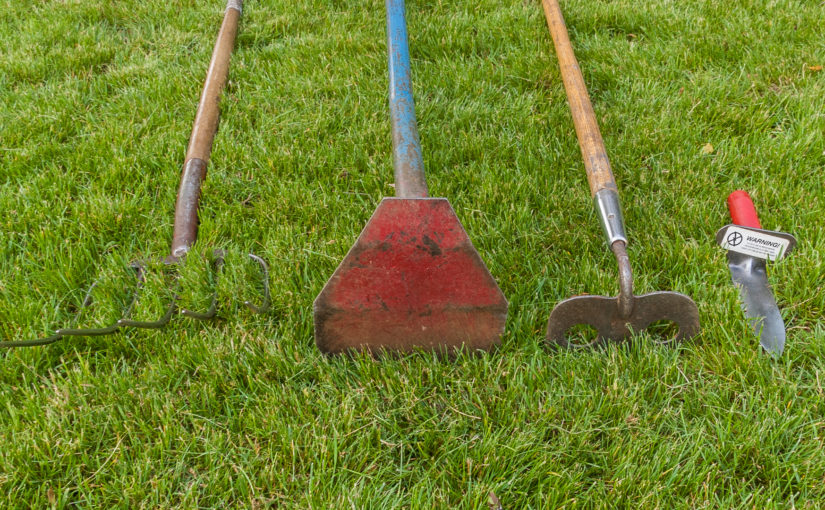
Weeding Tools Recommendations
First, I went through the beds with my weeding knife (Far right) and pulled the dandelions. If you cut dandelions with a hoe the long tap-root will grow back. You have to dig down and remove the root.
Next, I went through the front of the bed with my grub hoe (Second from left). The grub hoe packs more of a punch than a hoe. It’s perfect for removing heavy weeds and sod.
I used my cutting hoe (Second from right) where the weeds were sparse. A cutting hoe with a sharp edge is the right tool for stray chickweed.
Piles of weeds at the front of the bed ready to pick up with a manure fork.
A manure fork is a perfect tool to load weed piles into a wheelbarrow. A manure fork has sharp tines and lightweight. I recommend you buy a 5 tine manure fork.
I hope you’ll try one of the weeding tools above to improve your productivity when weeding gardens.
After three days of hard work I’m almost finished preparing a garden bed. It was a hard-fought victory that taught me tips for getting work done.
We’ve had a mild winter and I looked forward to working with the temperature in the 50’s and 60’s. Last week the weather changed. It’s been in the low 40’s with overcast skies and showers.
The first thing I do when I arrive at a job is formulate a plan to get the work done.
First, I removed six yards of mulch from around a Japanese Maple (Acer palmatum sp.) and the landscape fabric underneath. There was too much mulch around the tree.
There was over six inches of mulch under the Japanese Maple (Acer palmatum sp.) along with landscape fabric. The mulch and the landscape fabric had to go for the health of the tree.
Removing excess mulch around the Japanese Maple (Acer palmatum sp.).
The only place to get rid of the mulch was off the property. That meant loading a wheelbarrow and pushing it up a 15 foot slope to my truck about 40 yards away.
Did I mention this was my first job of the season? My body is nowhere near conditioned yet.
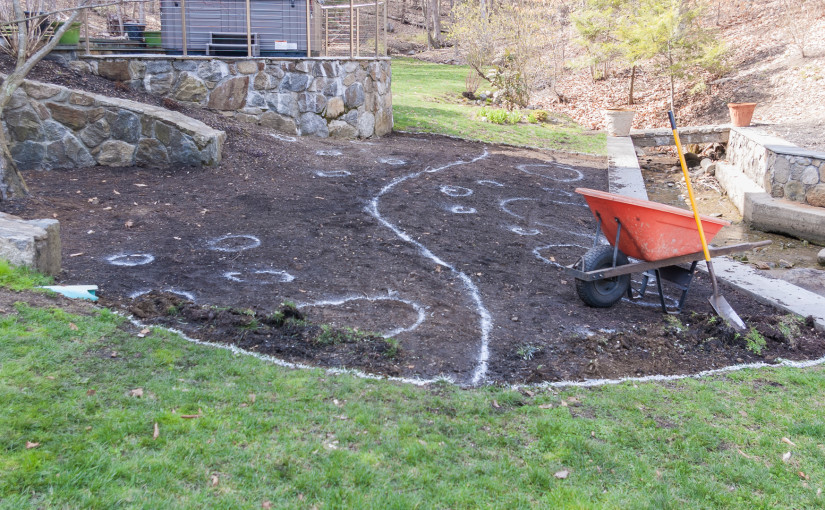
This afternoon as I finished for the day the sun broke through the clouds. It was like the heavens opened up and said, “Attaboy John!”
In a weird twist of fate the sun broke through the clouds as I was finishing for the day. The line through the bed is a future stepping stone path.
Tips for getting work done
Get started. Even if you don’t have a plan for how to do the work. When you start a plan will form in your mind. I’m talking about a plan to complete the work, not a landscape design.
Congratulate yourself for getting started. If you the type of person, like me, who occasionally over thinks things don’t beat yourself up for lost time.
Enjoy the work. I enjoy good “clean” hard work. Digging, mulching, splitting wood, etc. I feel energized, albeit exhausted, after a days work.
Break the job into manageable pieces. I set a goal for each day. My first day on most jobs the goal is to get to the job and get started. Once I’m working a plan will form (See step 1). The second day my goal was to clean up the mulch under the Japanese Maple. The third day my goal was to finish preparing the bed. By the third day I gained momentum and prepared another bed.
Take a break if you need one. Nothing saps productivity like rushing through a job or stressing about a deadline. It may seem counter productive but you’ll notice big dividends from a break.
Wear comfortable shoes. A landscaper is only as good as his or her footwear. If your shoes are heavy you’ll move slowly. If your feet are wet your day will be miserable. Some days I bring a couple pair of shoes and a heavy and light weight sweatshirt. The first two days I wore heavy insulated steel toe boots. When the sun broke I put my lightweight Muck Boots on and felt like I could fly. I wear the lightest shoes I can. The exception is when I need steel toes for safety.
Given the choice I prefer my lighter and more comfortable muck boots.
You started the job. You’re going to finish it. That’s all that matters.
I hope these tips for getting work done will help you get through your next job. Get out there and have fun!
I just returned from an evening walk with Theo and my forehead burns from a fresh scratch.
Theo walked around a tree four feet from the road. As I went around the back a branch caught me 3 inches above the eyes.
I did have a flashlight. I was looking at the ground for footing and suddenly smack!
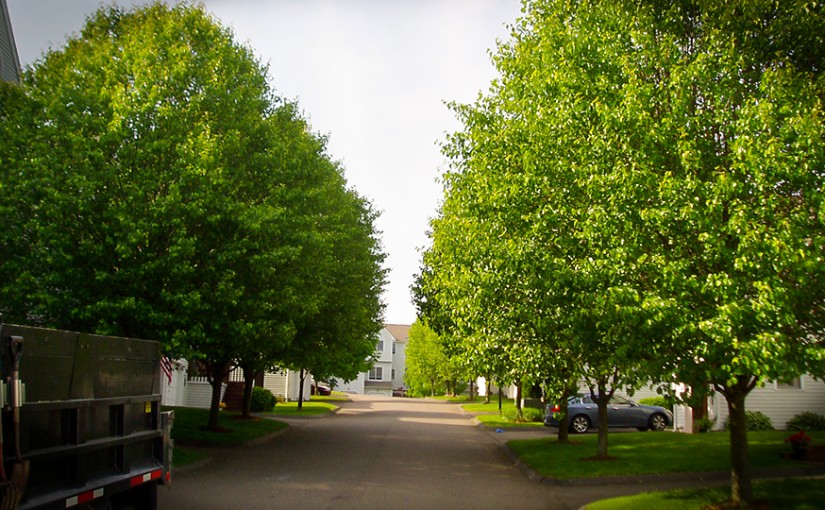
This is a great example of why it’s so important to prune lawn trees above people’s heads. Assume folks will be walking in the dark and can’t see where they’re going.
People driving down the street or your driveway also appreciate not having their cars scratched.
A final friendly tip. Don’t leave stubs on a tree, especially at eye height, where someone can lose an eye.
Theo our Great Pyrenees mix puppy. He’s 90 lbs at just over a year old. What a sweetheart. He loves people, dogs, cats and creatures of all shapes and sizes.